Working with Projects
Each Kargo project is represented by a cluster-scoped Kubernetes resource of
type Project. Reconciliation of such a resource effects all boilerplate
project initialization, including the creation of a specially-labeled
Namespace with the same name as the Project. All resources belonging to a
given Project should be grouped together in that Namespace.
A minimal Project resource looks like the following:
apiVersion: kargo.akuity.io/v1alpha1
kind: Project
metadata:
  name: example
Deletion of a Project resource results in the deletion of the corresponding
Namespace. For convenience, the inverse is also true -- deletion of a
project's Namespace results in the deletion of the corresponding Project
resource.
There are compelling advantages to using Project resources instead of
permitting users to create Namespace resources directly:
-
The required label indicating a
Namespaceis a Kargo project cannot be forgotten or misapplied. -
Users can be granted permission to indirectly create
Namespaceresources for Kargo projects only without being granted more general permissions to create any newNamespacedirectly. -
Boilerplate configuration is automatically created at the time of
Projectcreation. This includes things such as project-level RBAC resources andServiceAccountresources.
Project Configuration
A ProjectConfig resource defines project-level configuration for an associated
Project. This includes
promotion policies
that describe which Stages are eligible for automatic promotion of newly
available Freight, as well as
auto-rollback configuration for automatically reverting a
Stage to a previously verified Freight when verification fails.
The ProjectConfig resource must have the same name as its associated Project
and be created in the Namespace of the Project. This separation of
configuration from the Project resource enables more granular RBAC control.
Users can be granted permission to modify project configurations via
ProjectConfig resources without necessarily having broader access to Project
resources themselves.
Promotion Policies
A ProjectConfig resource can contain multiple promotion policies. Each policy
is defined by a stageSelector and an autoPromotionEnabled flag. The
stageSelector specifies which Stages the policy applies to, and the
autoPromotionEnabled flag indicates whether automatic promotion is enabled for
those Stages.
This section focuses only on enabling or disabling auto-promotion for specific
Stages through Project-level configuration. For Stage-level controls over
which Freight are eligible for auto-promotion when enabled, refer to the
Auto-Promotion section of our
Working with Stages guide.
Basic Promotion Policy
In the example below, the test and uat Stages are eligible for automatic
promotion of newly available Freight, but any other Stages in the Project
are not:
---
apiVersion: kargo.akuity.io/v1alpha1
kind: Project
metadata:
   name: example
---
apiVersion: kargo.akuity.io/v1alpha1
kind: ProjectConfig
metadata:
  name: example
  namespace: example
spec:
  promotionPolicies:
  - stageSelector:
      name: test
    autoPromotionEnabled: true
  - stageSelector:
      name: uat
    autoPromotionEnabled: true
Advanced Promotion Policies with Selectors
Kargo supports more flexible ways to specify which Stages a promotion policy
applies to, using either pattern matching or label selectors.
Pattern and label matching introduce security considerations. Users with appropriate permissions could potentially create resources with names or labels deliberately crafted to match patterns, bypassing intended promotion controls. Using exact names provides the most secure option.
Using Stage Selectors with Patterns
You can use the stageSelector field with pattern matching to apply a promotion
policy to multiple Stages that match a specific pattern:
---
apiVersion: kargo.akuity.io/v1alpha1
kind: Project
metadata:
  name: example
---
apiVersion: kargo.akuity.io/v1alpha1
kind: ProjectConfig
metadata:
  name: example
  namespace: example
spec:
  promotionPolicies:
  - stageSelector:
      # Apply to a specific stage by exact name
      name: prod-east
    autoPromotionEnabled: false
  - stageSelector:
      # Apply to all stages matching a regex pattern
      name: "regex:test-.*"
    autoPromotionEnabled: true
  - stageSelector:
      # Apply to all stages matching a glob pattern
      name: "glob:dev-*"
    autoPromotionEnabled: true
The pattern matching supports:
- Exact name matching (when no prefix is used)
- Regex patterns with prefix
regex:orregexp: - Glob patterns with prefix
glob:
Using Stage Selectors with Labels
You can also use
Kubernetes-style label selectors
to apply a promotion policy to Stages with specific labels:
---
apiVersion: kargo.akuity.io/v1alpha1
kind: Project
metadata:
  name: example
---
apiVersion: kargo.akuity.io/v1alpha1
kind: ProjectConfig
metadata:
  name: example
  namespace: example
spec:
  promotionPolicies:
  - stageSelector:
      matchLabels:
        environment: development
    autoPromotionEnabled: true
  - stageSelector:
      matchExpressions:
      - key: environment
        operator: In
        values: ["development", "staging"]
    autoPromotionEnabled: true
Using Stage Selectors with Patterns and Labels
The name and
label selectors can be combined, in which
case a Stage must match both the name and label selectors to be eligible for
automatic promotion:
---
apiVersion: kargo.akuity.io/v1alpha1
kind: Project
metadata:
  name: example
---
apiVersion: kargo.akuity.io/v1alpha1
kind: ProjectConfig
metadata:
  name: example
  namespace: example
spec:
  promotionPolicies:
  - stageSelector:
      name: glob:prod-*
      matchLabels:
        example.org/allow-auto-promotion: "true"
In the example above, the promotion policy applies to all Stages with the
example.org/allow-auto-promotion: "true" label and names matching the
glob:prod-* pattern.
Auto-Rollback
When verification fails on a Stage, Kargo can automatically promote that
Stage back to its most recently verified Freight — its stable Freight —
without manual intervention. This reduces mean time to recovery (MTTR) by
eliminating the need for a human to notice, decide, and trigger a rollback.
How it works: Each time Freight is successfully verified in a Stage,
the rollback controller records it as that Stage's stable Freight — the
known-good version it will roll back to if something goes wrong. When a
subsequent verification or promotion fails, the controller automatically creates
a new Promotion targeting that stable Freight. The rollback Promotion
follows the same promotion steps as any normal Promotion — no special step
logic is required, though steps can opt into rollback-specific behavior if
needed.
To enable auto-rollback, add an autoRollback field to any entry in the
promotionPolicies stanza of a ProjectConfig. The stageSelector field
supports the same exact names, regex patterns, glob patterns, and label
selectors described in
Advanced Promotion Policies with Selectors:
apiVersion: kargo.akuity.io/v1alpha1
kind: ProjectConfig
metadata:
  name: my-project
  namespace: my-project
spec:
  promotionPolicies:
  - stageSelector:
      name: prod
    autoRollback: {}
Stable Freight: Kargo tracks a stable Freight for each Warehouse a
Stage subscribes to. The stable Freight is updated whenever Freight passes
verification in that Stage. When a subsequent promotion or verification of a
different Freight fails, the rollback controller automatically creates a new
Promotion back to the stable Freight.
The stable Freight is recorded in the Stage's status:
status:
  metadata:
    stableFreight:
      Warehouse/my-warehouse: abc1234...
Rollback Promotions: A rollback Promotion is functionally identical to a
normal Promotion — it follows the same promotion steps. It is distinguishable
from regular promotions by the annotation kargo.akuity.io/rollback: "true".
Promotion steps can inspect the ctx.meta.promotion.rollback boolean to behave
differently during a rollback, for example to skip manual approval steps or send
a high-severity alert:
steps:
- if: "${{ ctx.meta.promotion.rollback }}"
  uses: send-message
  config:
    channel:
      kind: MessageChannel
      name: slack
    message: "${{ ctx.stage }} was rolled back to ${{ ctx.targetFreight.name }}"
autoRollback has two sub-fields that control
which terminal phases trigger a rollback:
| Field | Accepted values | Default |
|---|---|---|
onVerification | Failed, Error | [Failed] |
onPromotion | Failed, Errored | [] |
Failed means the process ran to completion and produced a definitive negative
result — for example, an AnalysisRun metric that exceeded its failure
threshold. Error/Errored means the process was unable to complete due to a
transient or infrastructure problem — for example, a network timeout, a missing
secret, or a crashed pod. Whether to roll back on errors is a judgment call:
the Freight itself may be fine, and retrying the promotion or verification
might succeed.
The spelling difference between Errored (promotion) and Error
(verification) is intentional — the latter draws from AnalysisRun phase
enums.
To roll back on both failed and errored verifications:
spec:
  promotionPolicies:
  - stageSelector:
      name: prod
    autoRollback:
      onVerification:
      - Failed
      - Error
To enable rollback on promotion outcomes as well:
spec:
  promotionPolicies:
  - stageSelector:
      name: prod
    autoRollback:
      onPromotion:
      - Failed
      - Errored
onPromotion defaults to [] because promotions can fail for infrastructure
reasons entirely unrelated to the Freight — for example, an expired
credential or a network timeout. Enable it only when promotion failures
reliably reflect a problem with the Freight itself.
Considerations:
-
Settled state: A rollback
Promotionis only created when theStageis settled — meaning noPromotionis currently running or pending. This prevents conflicts with in-flight manual or automated promotions. -
Maximum failure age: The rollback controller ignores failed verifications or promotions whose completion time is older than 20 minutes. This prevents spurious rollbacks from historical failures when auto-rollback is first enabled on a
Stagethat is not in a clean state. -
MatchUpstreamstages: Auto-rollback is not supported forStages that use aMatchUpstreamauto-promotion policy. SuchStages are silently skipped by the rollback controller. To recover aMatchUpstreamStage, promote the appropriate upstreamStageback to the desiredFreight. -
No rollbacks of rollbacks: If a rollback
Promotionitself fails, the controller does not create another rollbackPromotion. This prevents infinite rollback loops. -
No stable Freight: If a
Stagehas never successfully verified anyFreight, there is nothing to roll back to and no rollbackPromotionis created.
Message Channels
Projects can define message channels to facilitate notifications and message sending as part of
their workflows. Message channels can be configured for various platforms, such as Slack, SMTP, or
HTTP webhooks.
Channels are defined using the MessageChannel custom resource. This can be done either by applying
YAML manifests or in the Kargo UI (also via YAML, though this will be made more user-friendly in
future releases).
Any message channel specification must include only a single channel type (e.g., Slack, SMTP, or
HTTP, not multiple) and an optional secretRef to a Kubernetes Secret containing any necessary
credentials.
Examples
Slack
This is an example MessageChannel configuration for Slack showing all options with annotations:
apiVersion: ee.kargo.akuity.io/v1alpha1
kind: MessageChannel
metadata:
  name: test-env-slack
  # Must match the namespace of the Project
  namespace: kargo-demo
spec:
  # A reference to a Secret containing the Slack token. This is required for Slack. The Secret must
  # contain the following key:
  # - `apiKey`: The Slack token with permissions to post messages to the desired channel
  secretRef:
    # The `namespace` field is ignored for `MessageChannel` as it is only allowed to reference
    # Secrets in the same namespace
    name: slack-token
  # Configuration specific to Slack
  slack:
    # The channel ID to send messages to. This field is required
    channelID: C1234567890
SMTP
This is an example MessageChannel configuration for SMTP showing all options with annotations:
apiVersion: ee.kargo.akuity.io/v1alpha1
kind: MessageChannel
metadata:
  name: engineering-team-smtp
  # Must match the namespace of the Project
  namespace: kargo-demo
spec:
  # A reference to a Secret containing the SMTP credentials. This is required for SMTP. The Secret
  # must contain the following keys:
  # - `username`: The SMTP username
  # - `password`: The SMTP password
  secretRef:
    # The `namespace` field is ignored for `MessageChannel` as it is only allowed to reference
    # Secrets in the same namespace
    name: smtp-credentials
  smtp:
    # The email address to use in the "From" field. This field is required
    from: no-reply@example.com
    # The default recipient email addresses. This field is optional and can be overridden. The first
    # address in the list will be the primary recipient, and any additional addresses will be CC'd.
    to: [you@example.com]
    # The SMTP server host. This field is required
    host: smtp.gmail.com
    # The SMTP server port. This field is required
    port: 587
    # Whether to use TLS when connecting to the SMTP server. This field is optional and defaults to
    # true
    useTLS: true
    # Whether to skip TLS certificate verification. This field is optional and defaults to false.
    # In most cases this should only be set to true for testing with self-signed certificates.
    insecureSkipVerify: false
HTTP
HTTP channels are only supported by
EventRouters. They
cannot be used with the send-message
promotion step. To make HTTP requests as part of a promotion workflow, use the
http promotion step instead.
This is an example MessageChannel configuration for HTTP showing all options with annotations:
apiVersion: ee.kargo.akuity.io/v1alpha1
kind: MessageChannel
metadata:
  name: webhook-endpoint
  # Must match the namespace of the Project
  namespace: kargo-demo
spec:
  # A reference to a Secret containing authentication credentials. This is optional for HTTP.
  # The Secret may contain one of the following keys:
  # - `bearerToken`: A plain token that will be sent as a Bearer authorization header
  # - `authorization`: A custom value that will be sent verbatim as the Authorization header
  secretRef:
    # The `namespace` field is ignored for `MessageChannel` as it is only allowed to reference
    # Secrets in the same namespace
    name: webhook-secret
  # Configuration specific to HTTP
  http:
    # The endpoint to send the HTTP request to. This field is required
    url: https://hooks.example.com/notify
    # The HTTP method to use. Defaults to POST. Allowed values: GET, POST, PUT, PATCH, DELETE
    method: POST
    # Additional HTTP headers to include in the request. This field is optional
    headers:
    - name: Content-Type
      value: application/json
    # Additional query parameters to include in the request URL. This field is optional
    queryParams:
    - name: source
      value: kargo
    # Maximum time to wait for the request to complete. Must be a valid Go duration string.
    # Defaults to "10s"
    timeout: 30s
    # Whether to skip TLS certificate verification. Should only be used for development or testing
    insecureSkipTLSVerify: false
    # An expr-lang expression to evaluate whether the request succeeded. Has access to
    # response.status, response.body, and response.headers. If omitted, any 2XX status code is
    # treated as success. Can be overridden per-message in the EventRouter output
    successExpression: "response.status >= 200 && response.status < 300"
    # An expr-lang expression to evaluate whether the request failed. Has access to
    # response.status, response.body, and response.headers. If omitted, any non-2XX status code is
    # treated as failure. Can be overridden per-message in the EventRouter output
    failureExpression: "response.status >= 400"
The response.body field will attempt to parse the response body as JSON or YAML if the
Content-Type response header indicates a JSON or YAML response. If parsing fails or the content
type is not JSON/YAML, response.body will be treated as a string containing the raw response body.
When using success or failure expressions, please note that the 429 response status code (Too Many Requests) is reserved. Any response with this status code will never evaluate either expression as it is used to automatically backoff and retry requests that exceed rate limits.
Namespace Adoption
At times, Namespaces may require specific configuration to
comply with regulatory or organizational requirements. To
account for this, Kargo supports the adoption of pre-existing
Namespaces that are labeled with kargo.akuity.io/project: "true".
This enables pre-configuring such Namespaces according to your
own requirements.
Requiring a Namespace to have the kargo.akuity.io/project: "true" label to
be eligible for adoption by a new Project is intended to prevent accidental or
willful hijacking of an existing Namespace.
The following example demonstrates adoption of a Namespace that's been
pre-configured with a label unrelated to Kargo:
apiVersion: v1
kind: Namespace
metadata:
  name: example
labels:
  kargo.akuity.io/project: "true"
  example.com/org: platform-eng
---
apiVersion: kargo.akuity.io/v1alpha1
kind: Project
metadata:
  name: example
spec:
  # ...
Preventing Namespace Deletion
By default, when a Project is deleted, Kargo will attempt to delete the corresponding Namespace. However, there are scenarios where you may want to retain the namespace after the associated Project is removed whether it was created by Kargo or adopted from an existing setup.
To achieve this, you can apply the following annotation to the Namespace or
the corresponding Project resource with
kargo.akuity.io/keep-namespace: "true".
Interacting with Projects
Kargo provides tools to manage Projects using either its UI or
CLI. This section explains how to handle Projects effectively through both interfaces.
Creating a Project
- Using the UI
- Using the CLI
-
Navigate to the Kargo UI and select New Project in the top right corner.
A Form tab will appear where you can enter the name of your
Project: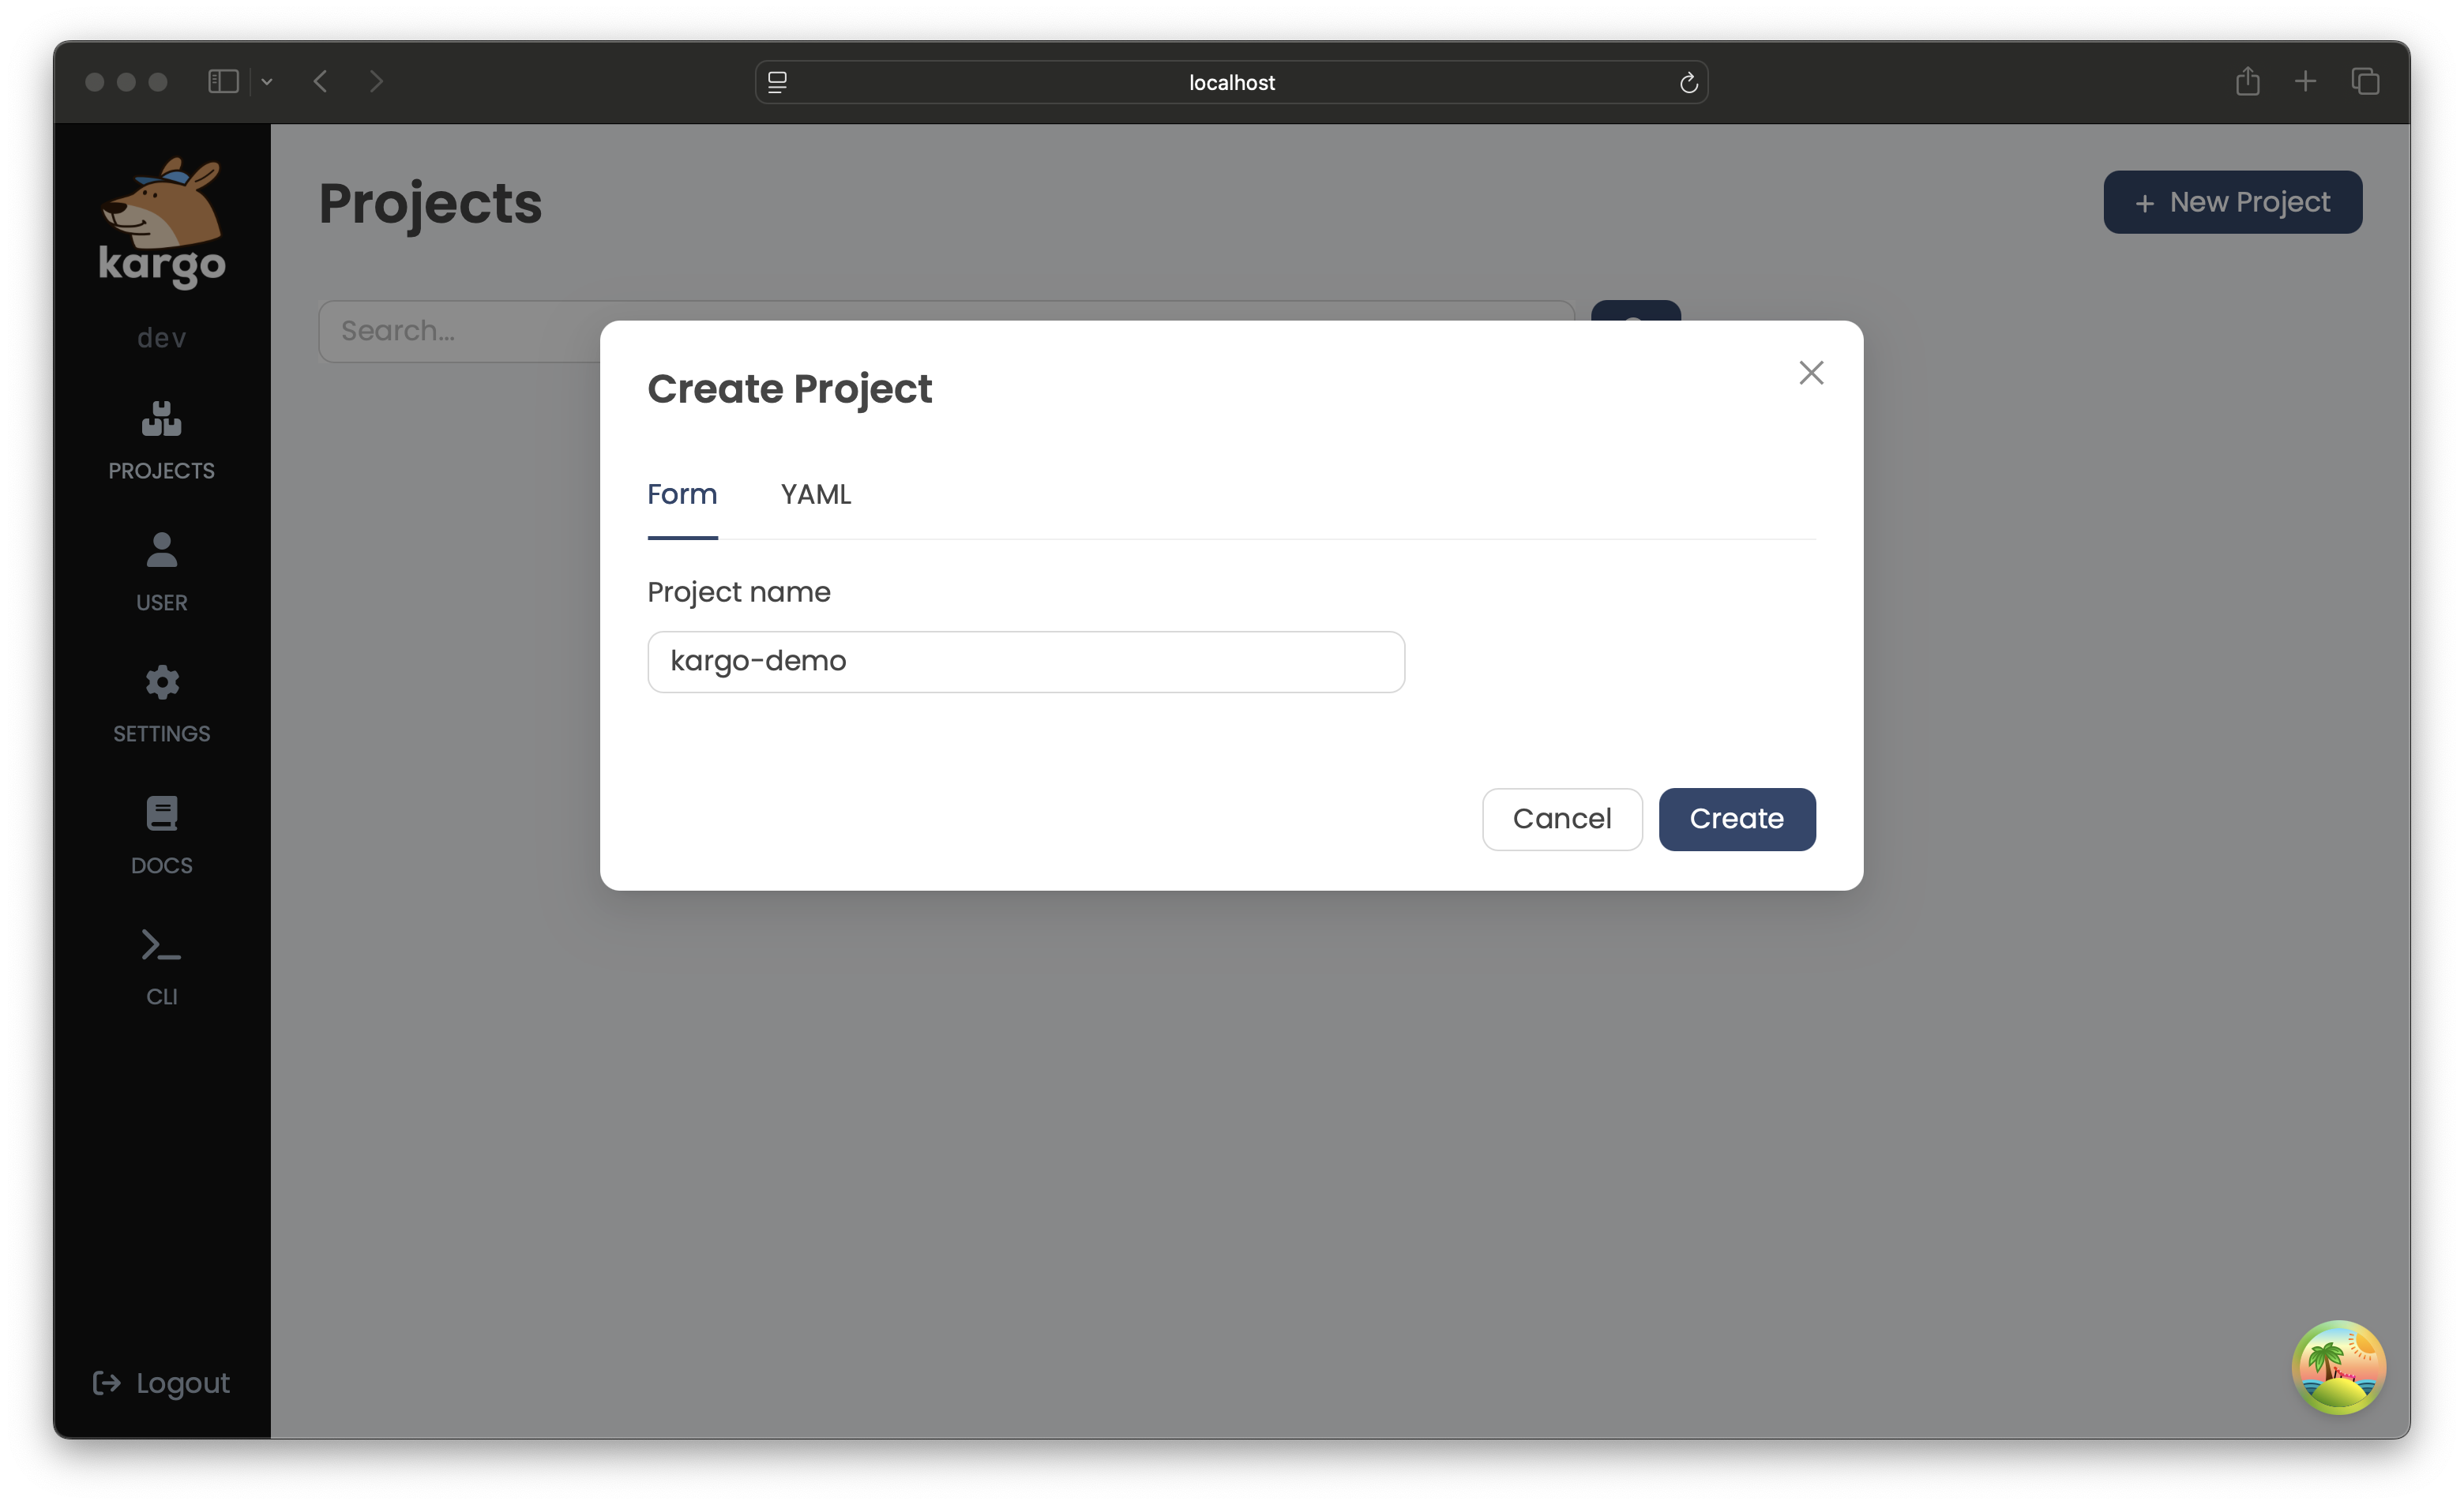
Alternatively, you can define the
Projectand other related configurations using the YAML tab: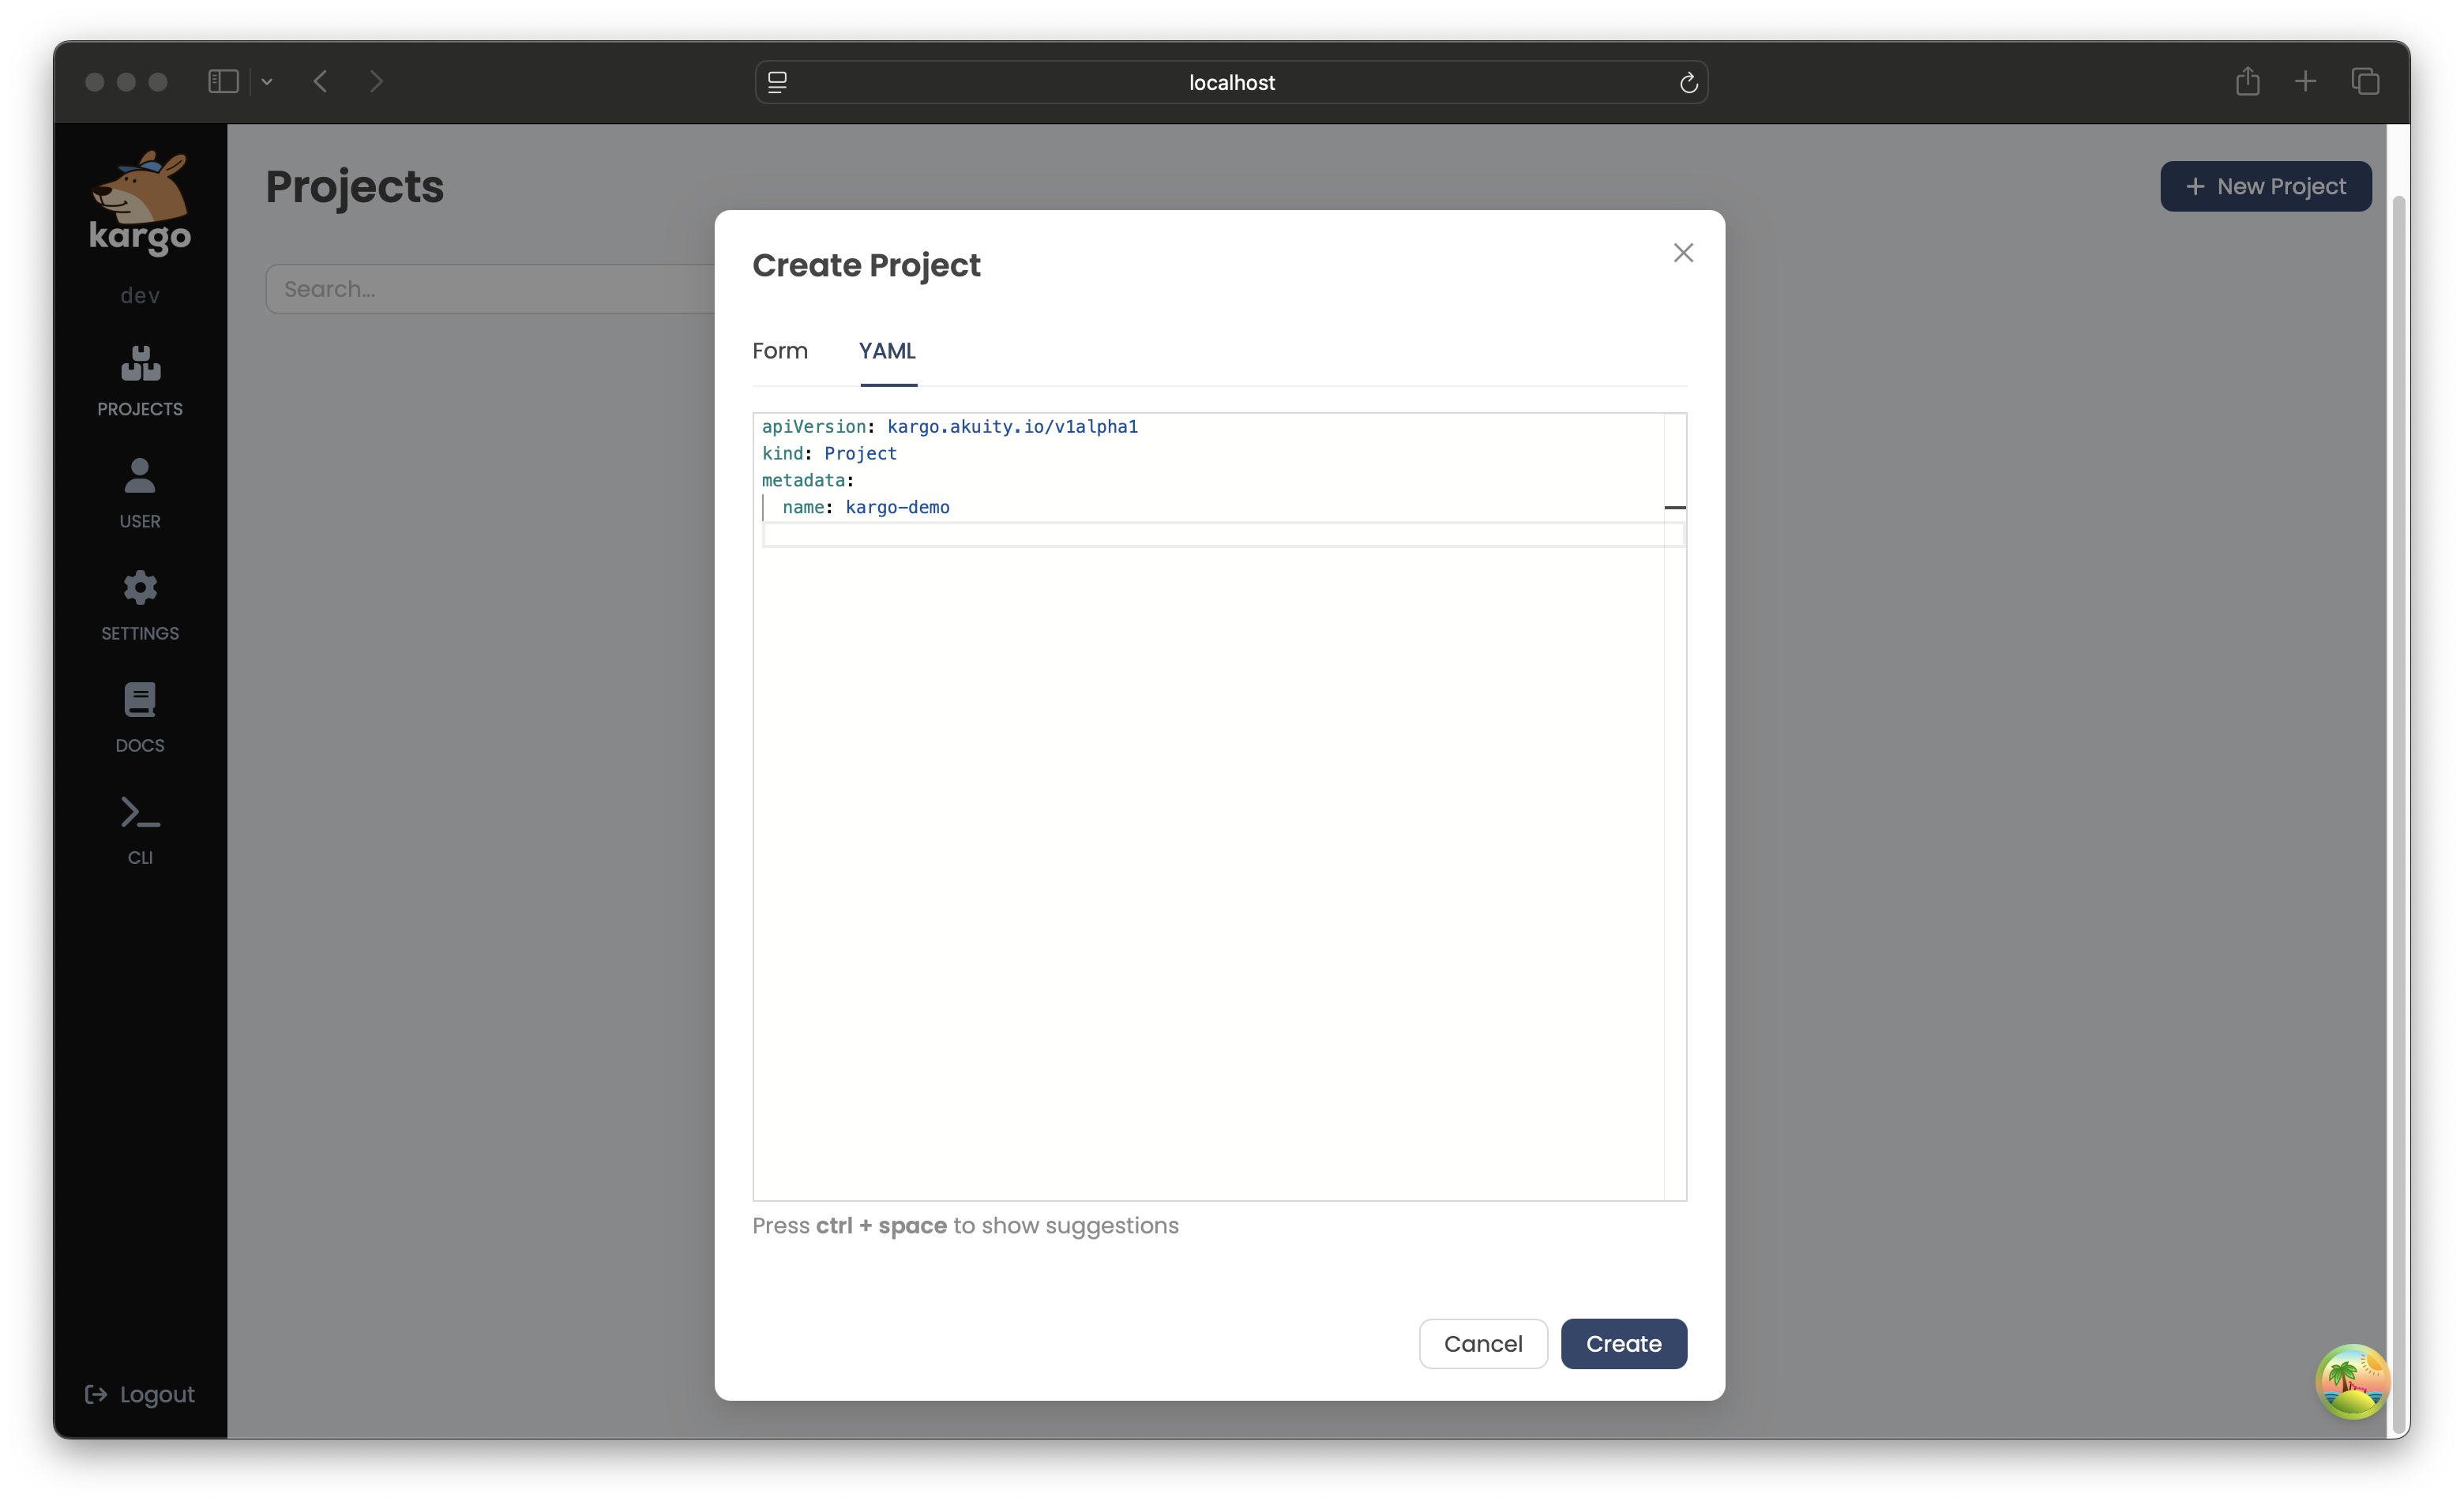
-
After completing the Form or defining the
Projectin the YAML tab, click Create.The new
Projectwill appear a card on the UI's home page: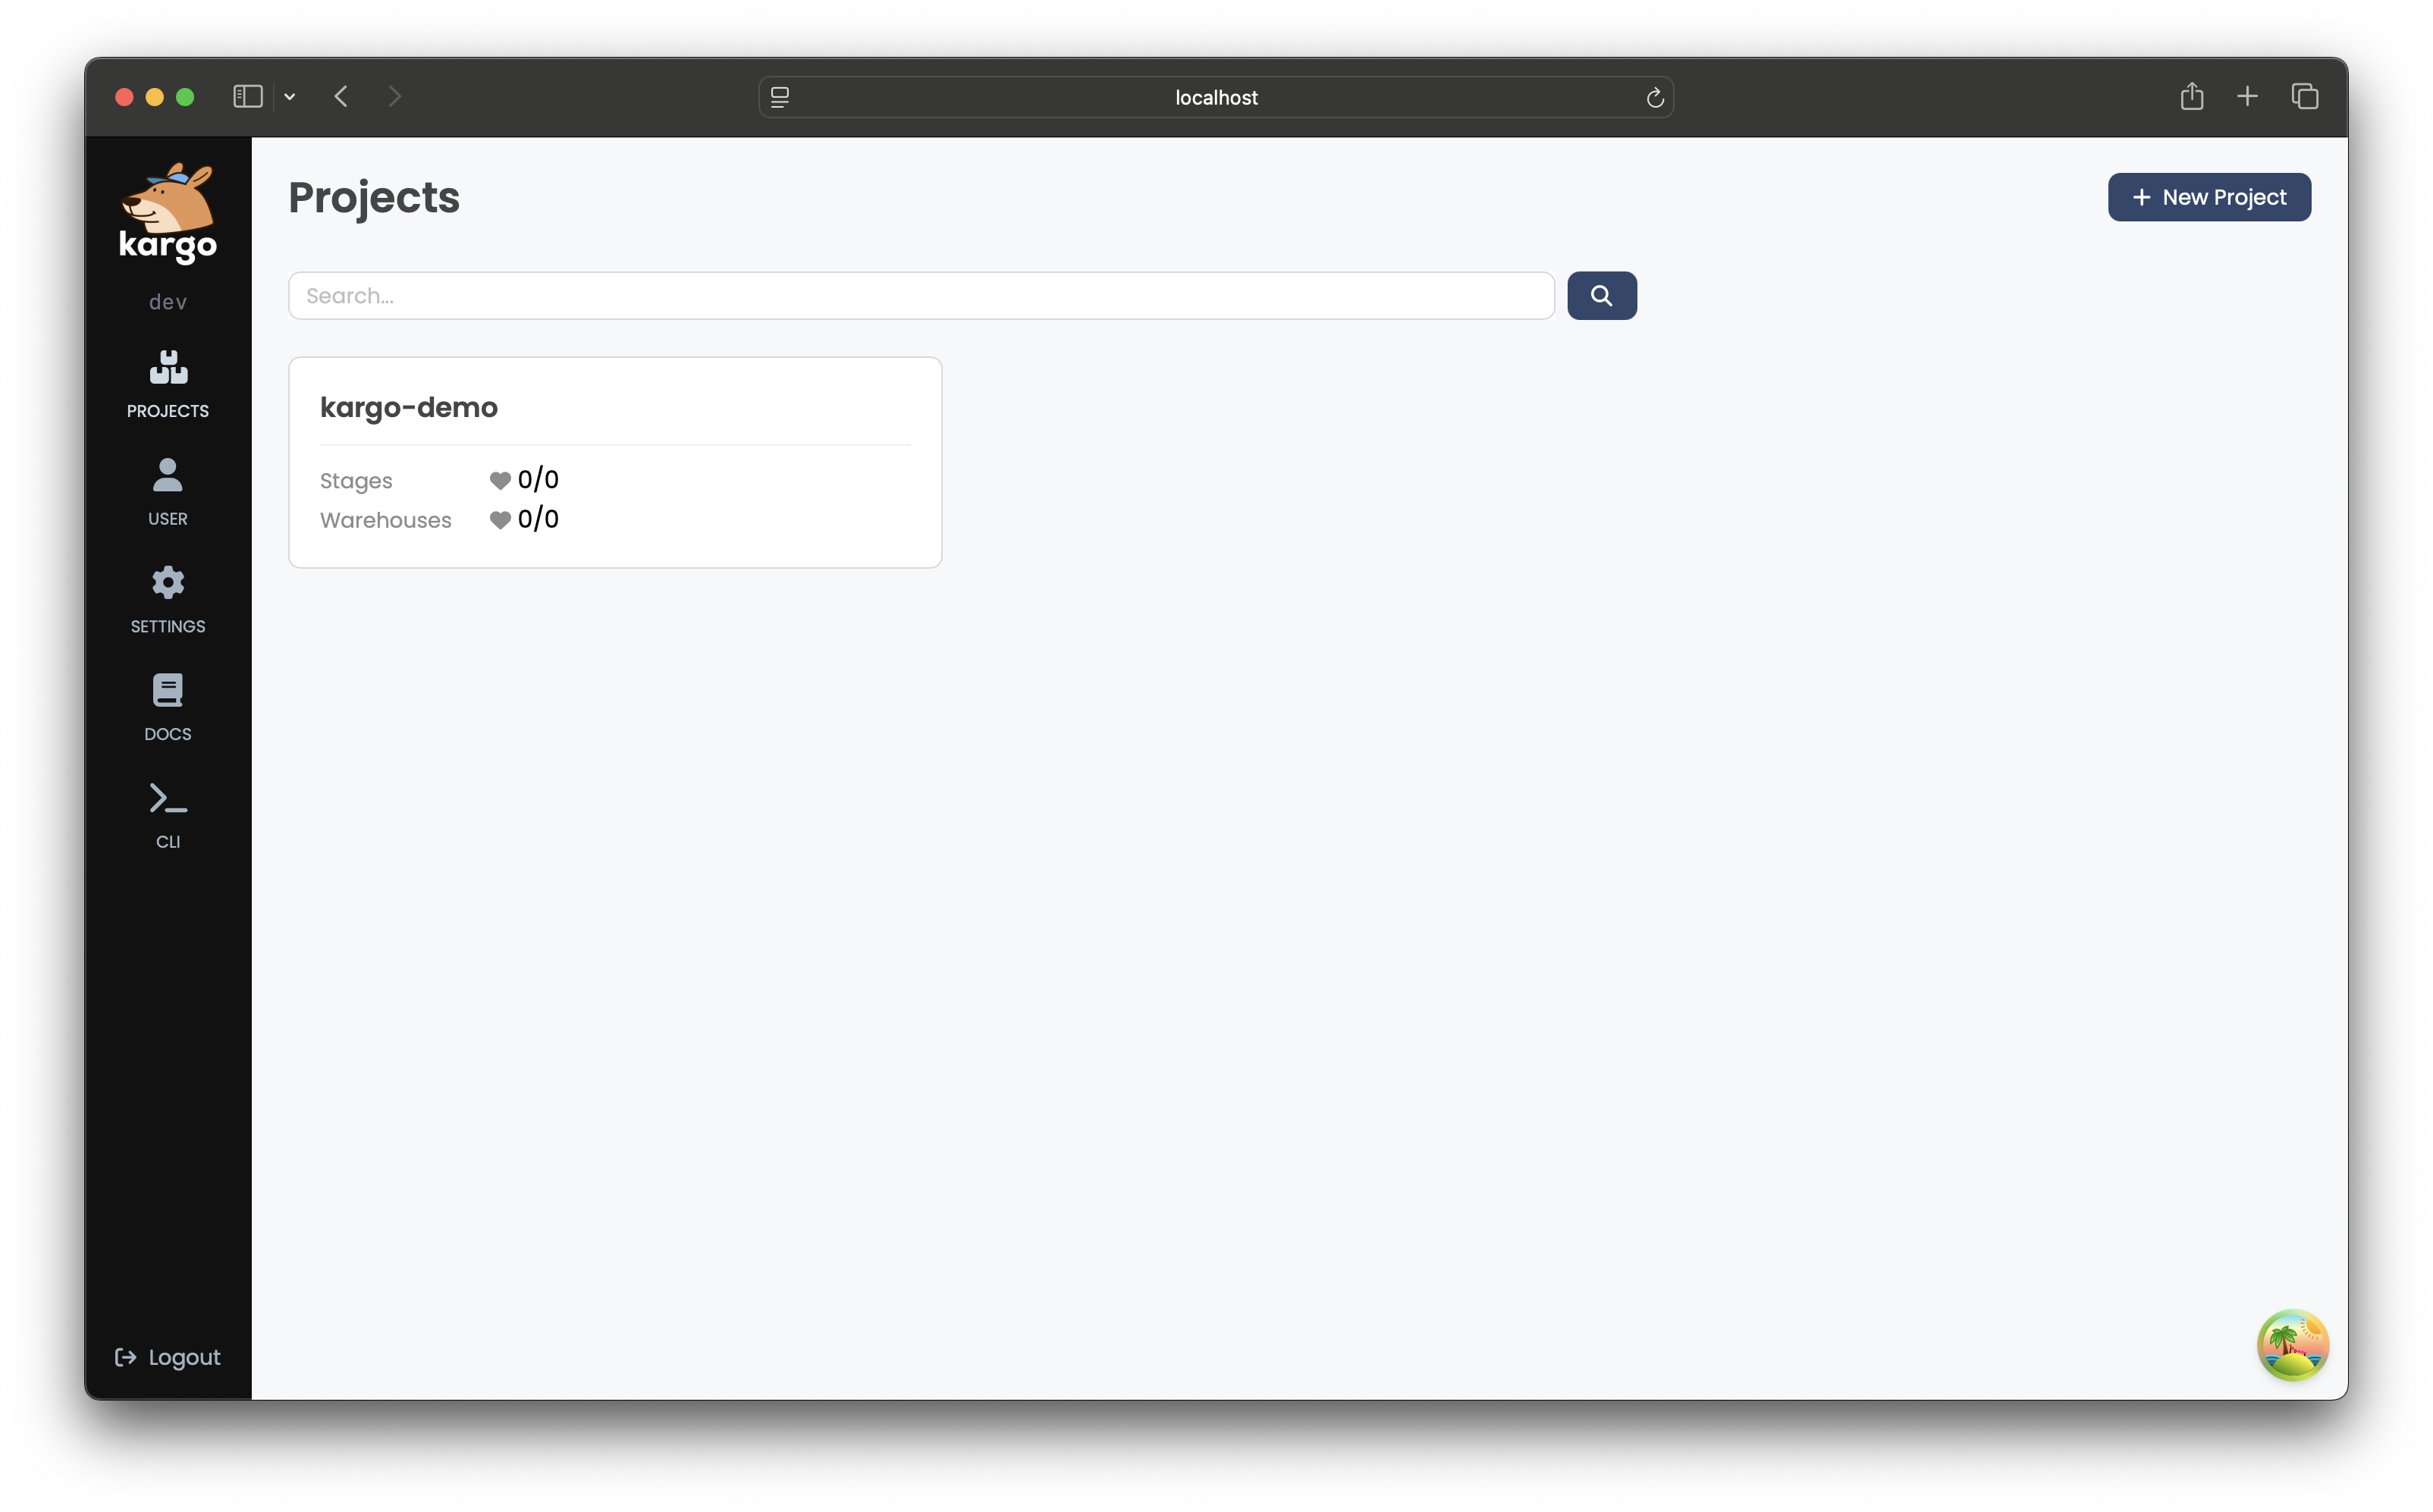
-
To create a
Projectusing the CLI, run:kargo create project <project>Alternatively, define the
Projectin a YAML file, for example:apiVersion: kargo.akuity.io/v1alpha1kind: Projectmetadata:name: <project>Save the file and run:
kargo create -f <filename> -
To verify creation of the
Project, run:kargo get project <project>
Deleting a Project
- Using the UI
- Using the CLI
-
Select the
Projectyou want to remove. -
Go to the Settings in the top right corner of the
Projectview.
-
In the General tab, scroll down to the Delete Project section.
-
To confirm deletion, enter the
Project's name and click Delete to permanently remove it: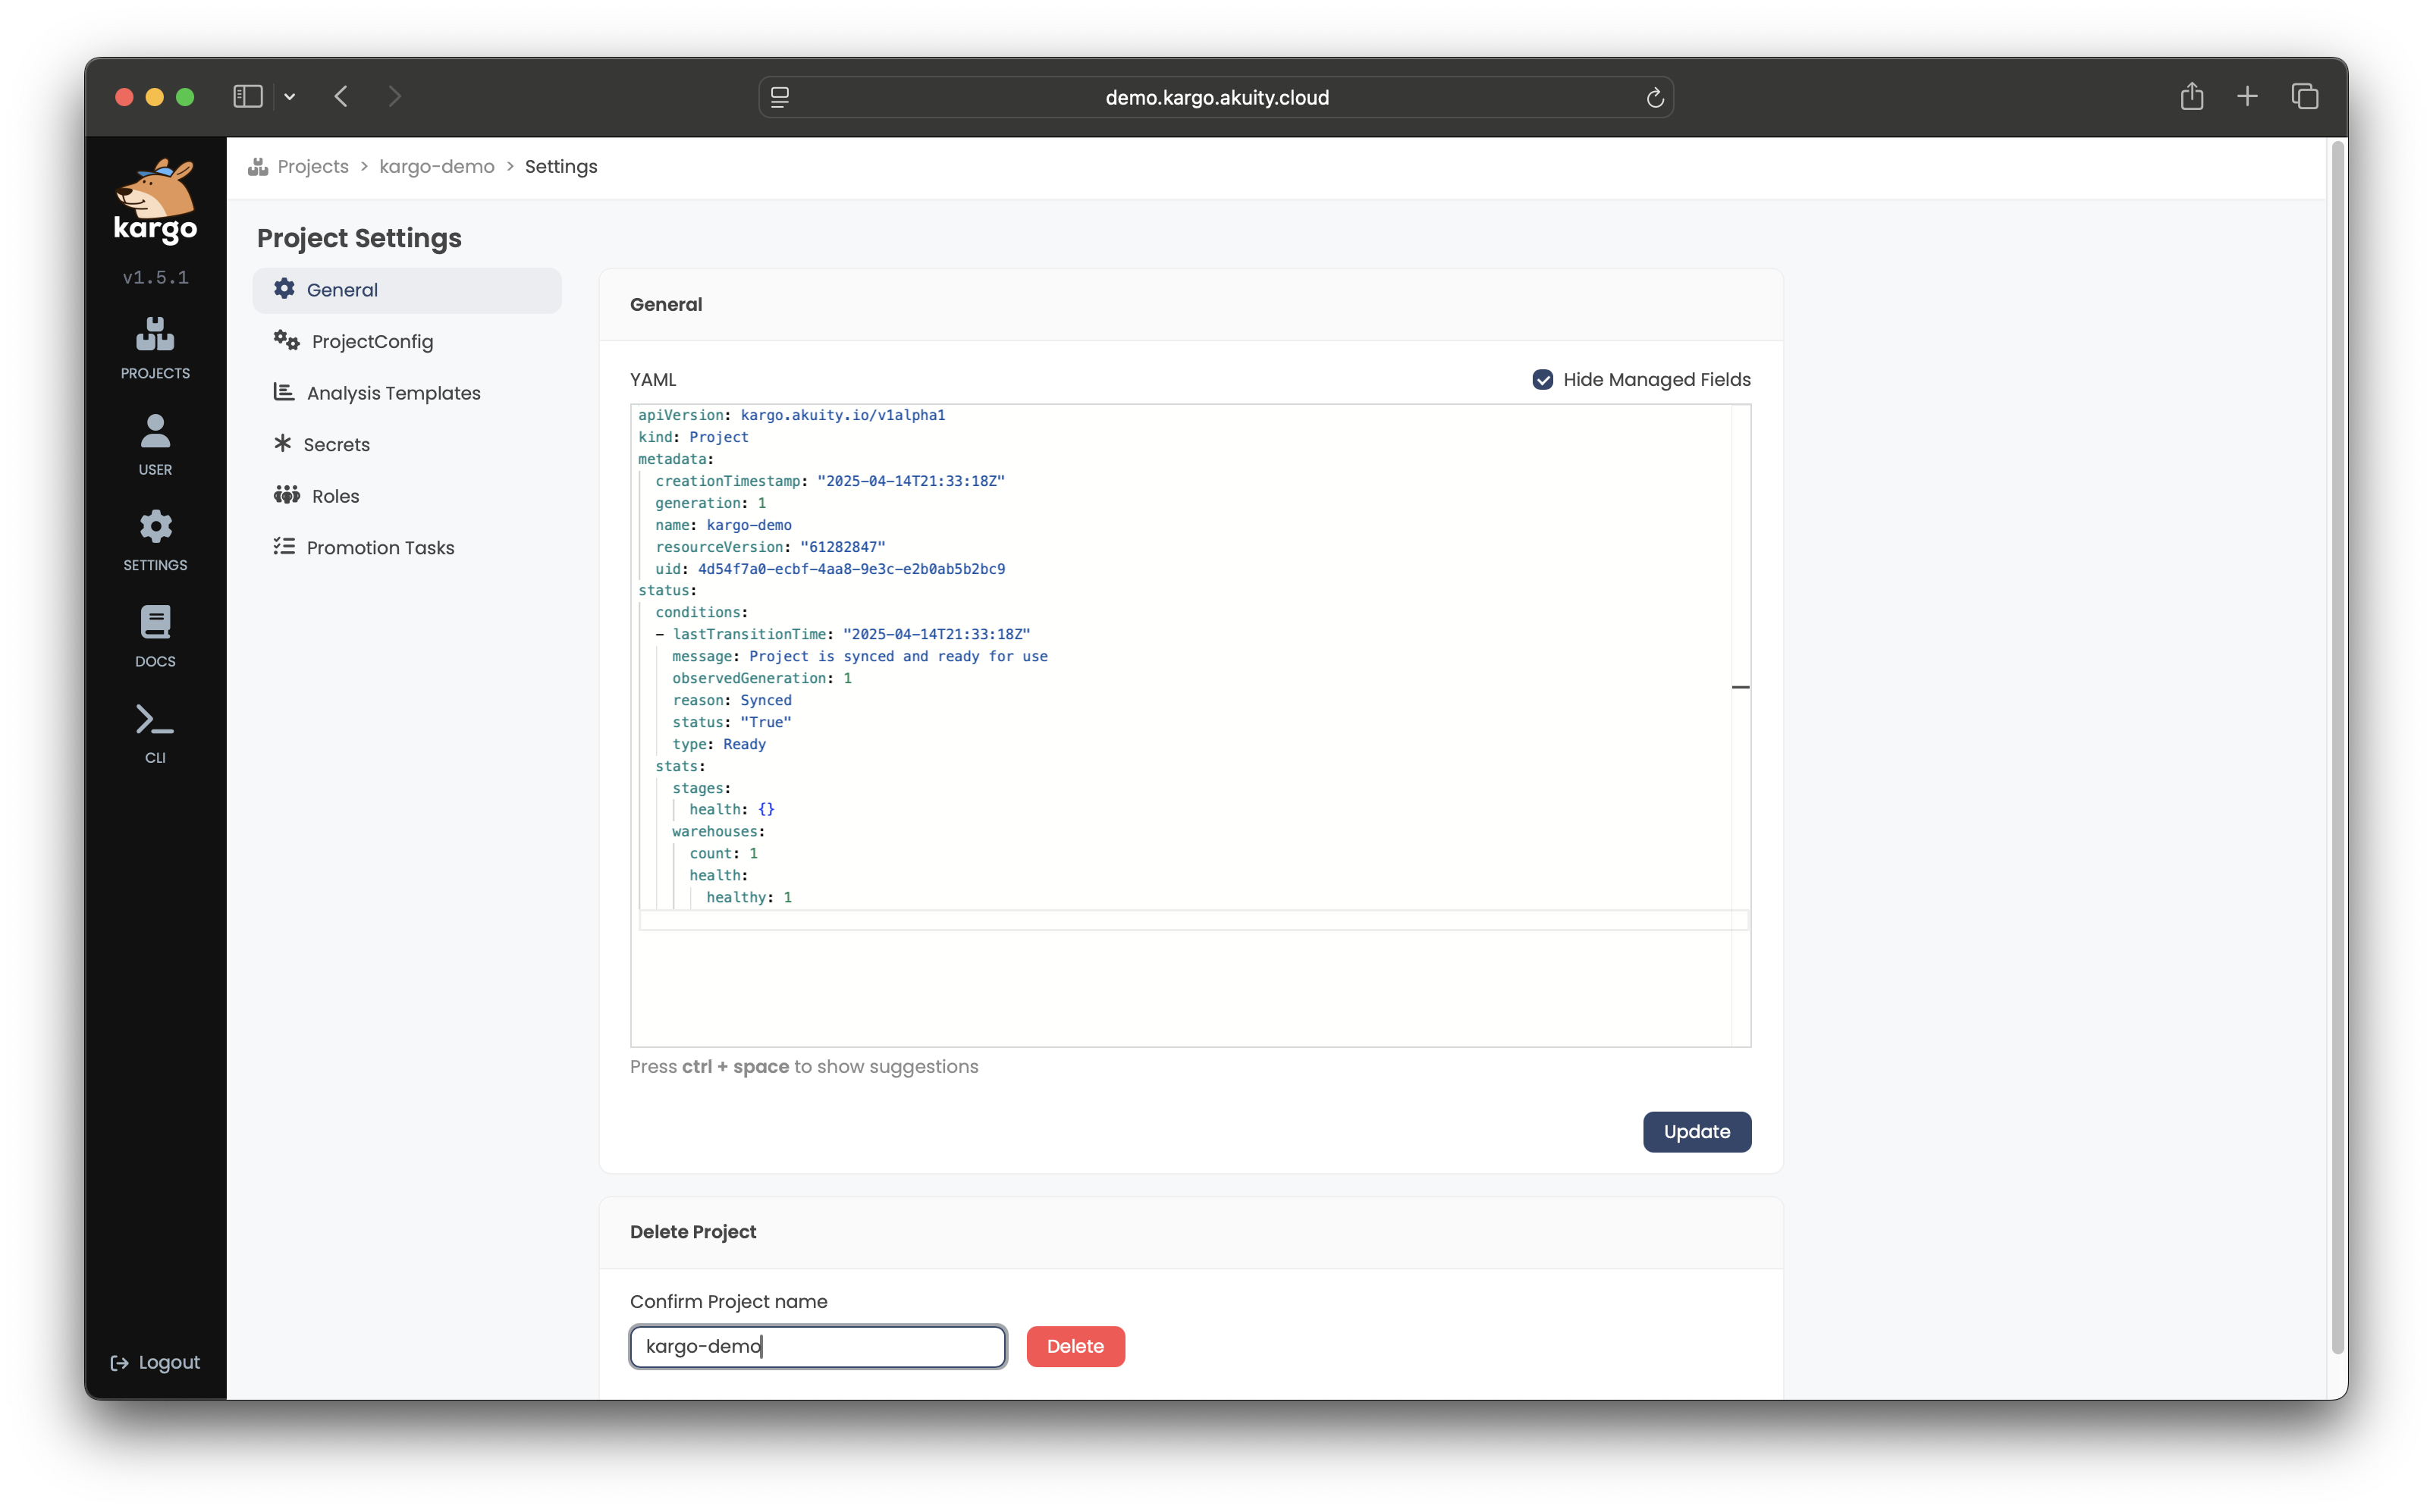
To delete a Project using the CLI, run:
kargo delete project <project>